How to Change a Bench Grinder Wheel
To change a bench grinder wheel, unplug the grinder first, then remove the guard, tool rest and flange nut on the side you're changing. Fit a wheel that matches the old one's diameter, thickness and arbor size, then tighten the flanges, refit the guard and rest, and dress the wheel before use.
On this page (9 sections)
- What tools do you need to change a bench grinder wheel?
- How do you remove the old wheel safely?
- How do you match a new wheel to your grinder?
- Which bench grinders make wheel changes easy?
- How do you mount the new wheel on the spindle?
- How do you refit the guard and tool rest?
- How do you true a new wheel before grinding?
- What mistakes should you avoid when changing a wheel?
- Final word on swapping a bench grinder wheel
To change a bench grinder wheel, unplug the grinder, then remove the guard, tool rest and flange nut on the side you're changing. Fit a replacement wheel that matches the old one's diameter, thickness and arbor hole, tighten the flanges and refit the guard and rest.
It's a job you can do in under an hour with the right tools. The steps are the same on a 6 inch or 8 inch machine, though the wheel sizes and nut direction differ.
What tools do you need to change a bench grinder wheel?
You need a wrench for the flange nut, a screwdriver for the guard and rest, and a soft mallet or puller for a wheel that's stuck on the spindle. Safety glasses and gloves belong on your hands and face from the start.
Most grinders ship with a stamped wrench for the flange nut. If yours is lost, a flat spanner or an adjustable wrench that fits the nut's flats works.
Add a wire brush or a clean rag for the spindle threads. Grit and old fiber washers hide there and cause wobble after the change.
For the final step you'll want a dressing tool. It's optional, but it saves time on a new wheel that runs out of round.
How do you remove the old wheel safely?
Unplug the grinder and let it come to a full stop, then loosen the flange nut while the wheel is still held by the spindle. Removing the guard first gives you room to work.
Follow this order:
- Unplug the cord and keep it in your hand until the job is done.
- Remove the wheel guard, noting how the spark deflector and eye shield fit.
- Take off the tool rest and keep its screws and shims together.
- Hold the wheel with a gloved hand and turn the flange nut.
- Slide off the outer flange, the blotter and the wheel.
The nut on one side turns clockwise and the other turns counter-clockwise, so the wheel's rotation keeps it tight. If the nut won't move, check which way the spindle turns before you force it.
Don't strike the wheel with a metal tool to break it free. A cracked wheel can fly apart when the grinder starts.
How do you match a new wheel to your grinder?
Match three numbers on the old wheel: outside diameter, thickness and arbor hole size. The grinder's speed rating must also be at or below the wheel's maximum speed.
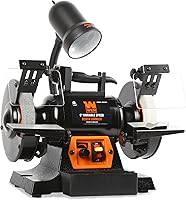
The DeWalt DW758 runs its wheels at 3,600 rpm. The WEN BG4260 runs 6 inch wheels at up to 3,450 rpm.
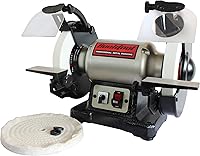
The BUCKTOOL low speed grinder turns its wheels at 1,750 rpm, so it suits wheels rated for slower speeds.
Check the wheel's label for its maximum rpm before you mount it. A wheel rated below the grinder's speed is a hazard, no matter how well the size fits.
Also match the arbor hole. A wheel with a 1 inch hole won't fit a grinder built for 5/8 inch, even though the outside diameter looks right.
If you're still choosing a machine to work on, our guide to what a bench grinder is used for covers the jobs each size handles.
Which bench grinders make wheel changes easy?
Grinders with removable guards and pivoting rests are the simplest to work on. All three machines here let you take the guard off to reach the wheel.
The WEN BG4260's guard removal is designed to be simple, which matters if you swap wheels often. Its 2.1 amp motor turns 6 by 3/4 inch wheels at up to 3,450 rpm.
The DeWalt DW758's 8 inch wheels are larger and heavier, so expect more torque on the flange nut. Its cast iron base holds steady while you work.
The BUCKTOOL runs at 1,750 rpm with a 1-1/2 inch wide wheel on one side. Slower speed means less heat at the edge and less need to re-dress often.
If you want to compare sharpening machines in more depth, our roundup of the best bench grinders for sharpening covers the models we rate.
How do you mount the new wheel on the spindle?
Slide the new wheel onto a clean spindle with the blotters and flanges in the right order, then tighten the nut firmly but not hard enough to crack the wheel. Clean mating surfaces stop wobble.
The order from the spindle outward is inner flange, inner blotter, wheel, outer blotter, outer flange, then the nut. The blotter is the paper or fiber disc that cushions the wheel against the metal flange.
Wipe the spindle and both flanges with a rag before fitting. A single grit particle under the flange tilts the wheel and causes vibration.
Hold the wheel flat and push it on until it seats. Don't hammer it or force it over a burred spindle; clean the burr first.
Tighten the nut by hand until it seats, then snug it with the wrench. Overtightening crushes the blotter and can crack the wheel at the arbor hole.
Why is the flange nut direction different on each side?
The left and right nuts turn in opposite directions so the wheel's rotation tightens them. The spindle spins one way on each end, so the thread matches.
Look at the spindle end or the grinder's label if the nut feels wrong. Forcing a nut against its thread can strip it or leave the wheel loose.
How do you refit the guard and tool rest?
Put the guard back before the rest, and set the rest close to the wheel so the gap stays under 1/8 inch. Both parts protect your hands and control the work.
The guard covers the top and back of the wheel. Line up its mounting holes, fit the screws loosely, then snug them once the guard sits flush.
Set the spark deflector so sparks fly down and away from you. The eye shield should sit between your face and the wheel.
Adjust the tool rest so its edge sits close to the wheel face. A wide gap lets small parts pull into the wheel.
Spin the wheel by hand once everything is back on. It should turn freely without rubbing the guard or rest.
How do you true a new wheel before grinding?
Dress the wheel with a dressing tool while it runs, then check that it spins true and cuts evenly. A new wheel often needs a light pass to run round.
Put on your safety glasses and stand to the side as you start the grinder. Let it reach full speed and listen for a wobble or a thump.
Press the dressing tool against the wheel face in short, light passes. Move it across the face to even out high spots.
Stop and re-check if the wheel keeps shaking. A wheel that still wobbles after dressing may have a seating problem or a cracked arbor hole.
When the wheel runs smooth, try a scrap of steel before you grind a good tool. Our guide to sharpening drill bits on a bench grinder shows how to hold the work against the rest.
If you're shopping for a smaller machine for a bench or a tight shop, our roundup of the best 6 inch bench grinders lists the models we rate.
What mistakes should you avoid when changing a wheel?
The biggest mistakes are leaving the grinder plugged in, fitting the wrong wheel size and overtightening the flange nut. Each one can ruin the wheel or hurt you.
Other common errors:
- Forcing a wheel over a dirty spindle, which cracks it.
- Reusing a torn blotter or a bent flange.
- Running without the guard after the change.
- Grinding on the side of a wheel not made for it.
Buy a wheel rated for your grinder's speed and size, keep the flanges and blotters in good shape, and always unplug before you start. Do those three things and the change takes minutes.
Final word on swapping a bench grinder wheel
Changing a bench grinder wheel comes down to three checks: unplug the machine, match the new wheel's size, arbor and speed rating, and tighten the flanges without crushing them. Then refit the guard and rest and dress the wheel before you grind a tool.
Work on one side at a time and keep the other wheel guarded. If the grinder wobbles or the wheel won't seat, stop and clean the spindle before you try again.
A slow, careful change keeps the wheel round and your hands safe.
Frequently asked questions
How do I know what size wheel to buy for my bench grinder?
Match the wheel to the grinder's rated diameter and maximum speed. Measure the old wheel's outside diameter, thickness and arbor hole, then check the label on the grinder for its RPM limit.
A wheel rated for a lower speed than the grinder runs is unsafe.
Do I need to unplug the grinder before changing a wheel?
Yes. Unplug the bench grinder before you touch the wheel or guards, even if it looks switched off.
A grinder plugged in while you work near the spindle can start unexpectedly.
Leave the cord in your hand until the job is done.
Why does the wheel wobble after I change it?
A wobble usually comes from dirt on the flanges or spindle, uneven flange tightening, or a wheel that needs dressing. Clean the mating surfaces, tighten the nut evenly, and true the wheel with a dressing tool before you use it on a tool edge.
How long does a bench grinder wheel last?
It depends on how often you grind and how much pressure you use. Wheels wear down as grit breaks away, so replace one when its diameter drops to the grinder maker's minimum or when it develops cracks, chips or a deep groove.