How to Change a Scroll Saw Blade Step by Step
To change a scroll saw blade, unplug the saw, release tension, remove the old blade, and secure a compatible replacement in both holders. Set tension by the manual and check the blade path before reconnecting power.
On this page (9 sections)
- How do you change a scroll saw blade safely?
- What should you check before removing the old blade?
- How do you choose a replacement blade?
- How do you install the replacement blade?
- How tight should the blade be after installation?
- What should you do after changing the blade?
- What mistakes can break or misalign a scroll saw blade?
- How do you change a scroll saw blade for an interior cut?
- Which blade and setup should you choose?
To change a scroll saw blade, unplug the saw, release its tension, remove the old blade, and fit a compatible replacement into both holders. Restore tension as the manual directs, then check that the blade moves freely before reconnecting power.
The right method depends on the blade holders. Check the saw manual for the tension control, holder positions, blade length, and whether your saw takes pinned blades, pinless blades, or both.
How do you change a scroll saw blade safely?
Unplug the saw before touching the blade or opening an access panel. Clear the table and wait for the blade to stop fully if the saw was just running.
- Switch off and unplug the saw.
- Remove the workpiece and move the hold-down foot if needed.
- Release blade tension using the saw's control.
- Open the access panel if the lower holder is enclosed.
- Loosen the holders and remove the old blade.
- Install the replacement with its teeth facing the direction specified in the manual.
- Secure both ends, close the panel, and restore tension.
- Check blade movement by hand only if the manual permits it.
Don't force a blade into a holder that doesn't match it. A poor fit can let the blade slip or sit out of line.
What should you check before removing the old blade?
Identify the blade ends and holder style before loosening anything. Note how the old blade sits, including its tooth direction and which end is held at the top and bottom.
Pinned blades have small cross pins at each end. Pinless blades have straight ends and need holders designed to clamp them securely.
Some saws accept both styles, while others require one type. If you can't tell which blade you have, check the manual or the saw's model information before buying a replacement.
How do you change a pinned scroll saw blade?
Release tension and lift each cross pin out of its holder. Keep your fingers clear of the teeth as you remove the blade.
Fit the new blade so each pin rests fully in its holder. Follow the manual for tooth direction and the order for securing the top and bottom ends.
Don't tighten a holder against the blade's teeth or leave a pin partly seated. If the blade won't sit securely, stop and confirm that it's the correct type and length.
How do you change a pinless scroll saw blade?
Loosen the clamps, remove the straight-ended blade, and seat the replacement fully in both holders. Tighten the clamps as directed by the manual.
Pinless blades can simplify interior cuts because a straight end can pass through a small starter hole. Release one end, feed the blade through the hole, reattach it, and restore tension before cutting.
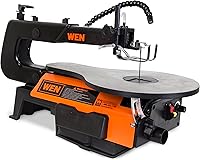
The WEN 3922 accepts pinned, pinless, and spiral blades. Its thumb screw adapter and opening side panel give you access to the lower holder.
The WEN 3923 also accepts those blade types and has an opening side panel. It adds a flexible work light, which helps if your work area needs more direct light.
How do you choose a replacement blade?
Start with holder compatibility, then choose a tooth pattern for the material and cut. Check blade length and the saw manual before comparing tooth counts or blade styles.
A higher tooth count can suit finer cuts, while a lower count can help with faster cutting. The workpiece, material, and curve also matter, so choose a blade made for the cut and keep a suitable spare nearby.
The FOXBC 36-pack contains 5 in plain-end blades in three tooth counts: 28 TPI, 12 TPI, and 10 TPI. It suits a scroll saw owner who wants several options for wood, plastic, or non-ferrous metal and whose saw takes plain-end blades.
Skip this set if your saw needs pinned blades or if you need another blade length. Confirm the holder requirements before choosing it; a range of tooth counts does not make the blades universal.
For help choosing a saw around your projects, see our guide to the best scroll saws for beginners. If you're weighing tools for curved cuts, our scroll saw vs jigsaw guide explains where each tool fits.
How do you install the replacement blade?
Seat the blade in both holders with its teeth facing the direction specified in the manual. Keep the blade straight and centered in its path as you secure the ends.
Follow the saw's sequence for attaching the top and bottom ends. If the lower holder is difficult to reach, use the access panel or release method described in the manual.
Check that the clamps or adapters hold the blade firmly. Close any panel before restoring tension, and move the workpiece and loose tools away from the blade.
How tight should the blade be after installation?
Set tension using your saw manual because the controls vary by model. Too little tension can let the blade wander; too much can strain or break it.
With the saw unplugged, confirm that both ends are secure and the blade is straight. If it twists, shifts, or feels loose at a holder, release tension and reseat it instead of tightening further.
Turn the blade path by hand only if the manual allows it. Stop if the blade catches or rubs against a nearby part.
What should you do after changing the blade?
Check seating, tension, and clearance before reconnecting power. Remove tools and loose parts from the table, close the access panel, and make sure the workpiece is supported.
Once the blade moves freely and the setup looks correct, reconnect power and make a short cut in scrap wood. Keep your hands clear and follow the saw's operating instructions.
If the blade wanders, slips, or makes an unusual sound, stop the saw and unplug it. Check the blade type, holder fit, tooth direction, and tension before trying again.
For broader curve-cutting habits, read our guide to using a band saw for beginners. The tools have different setups, but both call for a stable workpiece and a clear cut path.
What mistakes can break or misalign a scroll saw blade?
The most common mistakes are a poor fit, incomplete seating, incorrect tooth direction, and excessive force while cutting. Stop and correct the setup if the blade slips, binds, or wanders.
Use a blade suited to the material and cut, and feed the work at a controlled pace. Don't push harder when the blade slows or binds; stop the saw and inspect the setup.
A damaged or worn blade can also break. Replace it with a compatible blade and follow the manual's instructions for installation and tension.
How do you change a scroll saw blade for an interior cut?
Unplug the saw, remove one end of the blade, and feed it through the workpiece's starter hole. Reattach that end in its holder and restore tension before cutting.
Drill the hole inside the waste area, large enough for the blade end to pass through. Keep the saw unplugged while threading the blade and support the workpiece on the table.
Use a pinless blade only if your saw accepts it. If threading or clamping feels awkward, check the manual's steps before continuing.
Which blade and setup should you choose?
Choose by holder first, cut second, and access needs third. The FOXBC set suits plain-end compatible saws when you want three tooth counts; skip it if your saw needs pinned blades.
Choose the WEN 3922 if you want broad holder compatibility, including spiral blades, and an opening side panel for lower-holder access. Choose the WEN 3923 if you also want its flexible work light; compare the WEN 3922 review for more on that model.
For any saw, disconnect power before blade changes, follow the manual for tension and direction, and verify the fit before cutting. That routine is the core of how to change a scroll saw blade safely.
Frequently asked questions
Should you unplug a scroll saw before changing the blade?
Yes. Switch the saw off and unplug it before loosening the blade or opening an access panel.
This keeps the saw from starting while your hands are near the blade.
How do you know which scroll saw blade to buy?
Check the saw manual for blade type, length, and holder requirements. Scroll saws may use pinned or pinless blades, and some holders accept both.
Match the blade to the saw and cut, then confirm both ends seat fully and the teeth face the direction specified by the manual.
How tight should a scroll saw blade be?
Set blade tension according to the saw manual because controls vary by model. The blade should stay secure and aligned, but a generic tension setting may not suit every saw.
With power disconnected, check that the blade is seated and moves freely through its path.
Can you change a scroll saw blade for an interior cut?
Yes. Unplug the saw, release tension, remove one end of the blade, and pass it through the workpiece's starter hole.
Reattach it as the manual directs, secure both ends, and restore tension before reconnecting power.